- Login
- Click on the drop down arrow next to the icon in the top right corner of the page
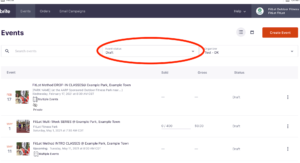
- Select Manage Events

- Click on the “Events Status” menu bar and select “Draft” from the drop down menu.
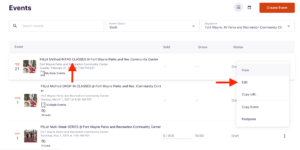
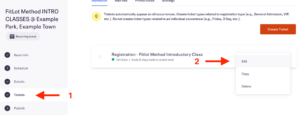
- Click the three vertical dots ፧ on the right of the DROP-IN CLASSES
- Select “Edit” from the drop down menu.
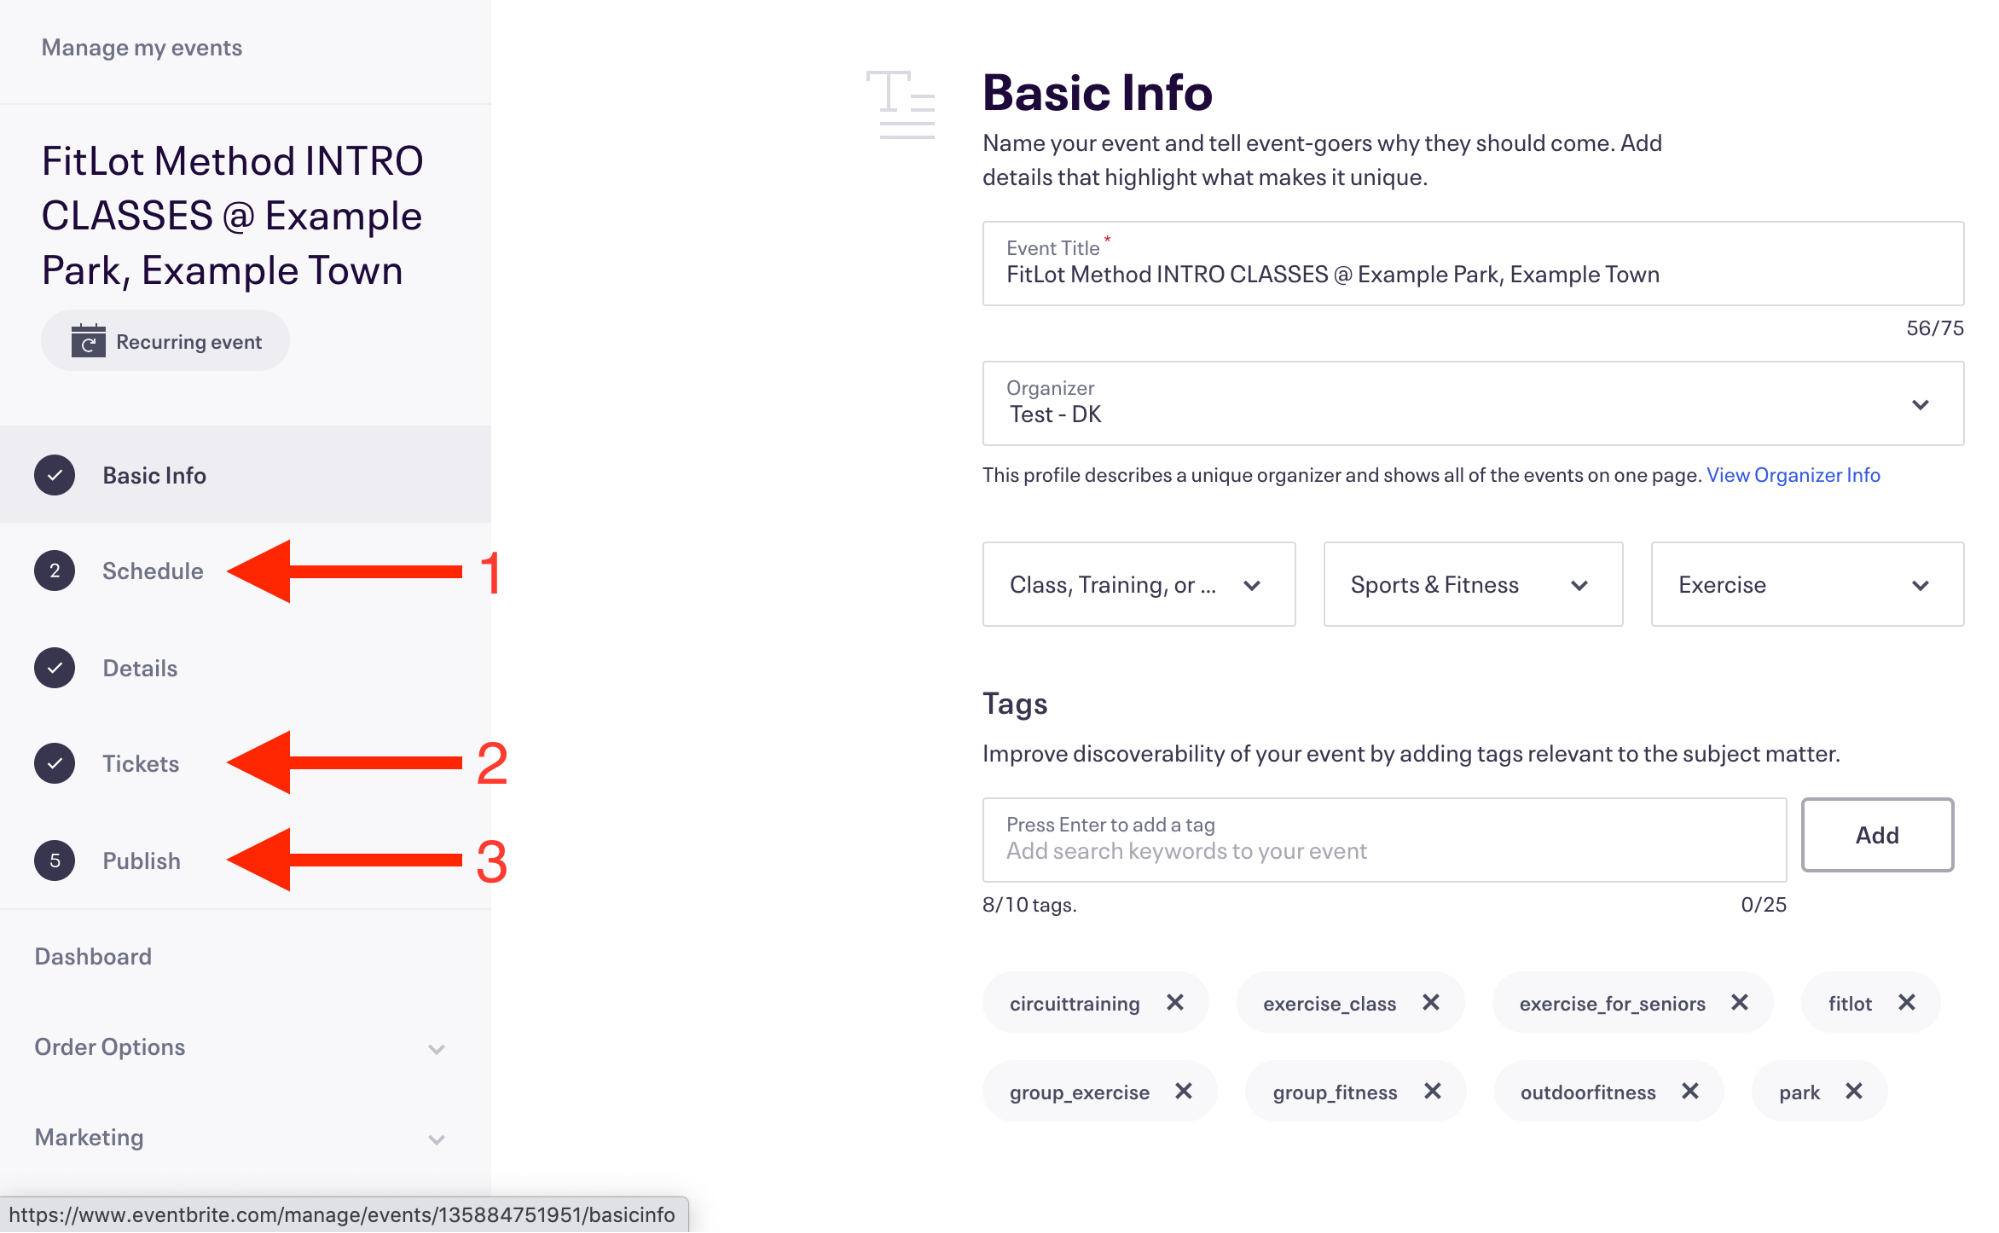
- Most information is pre-populated for you. You will only customize the Schedule (1), Tickets (2), and Publish (3) pages.
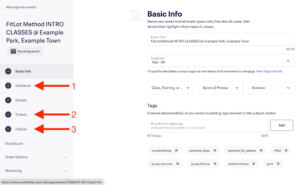
- Select “Schedule” from the menu on the left.
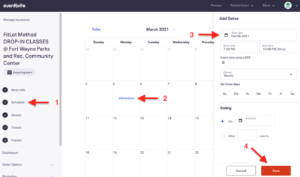
- – Hover over the date of the class.
- – The word “Schedule” will appear in blue, click on it.
- – A menu on the right will appear
- Check the date
- Enter the time of the class
- Select once
- Click save at the bottom right of the screen
- Repeat steps 1-5 of step 8 to schedule any additional classes
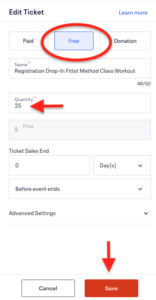
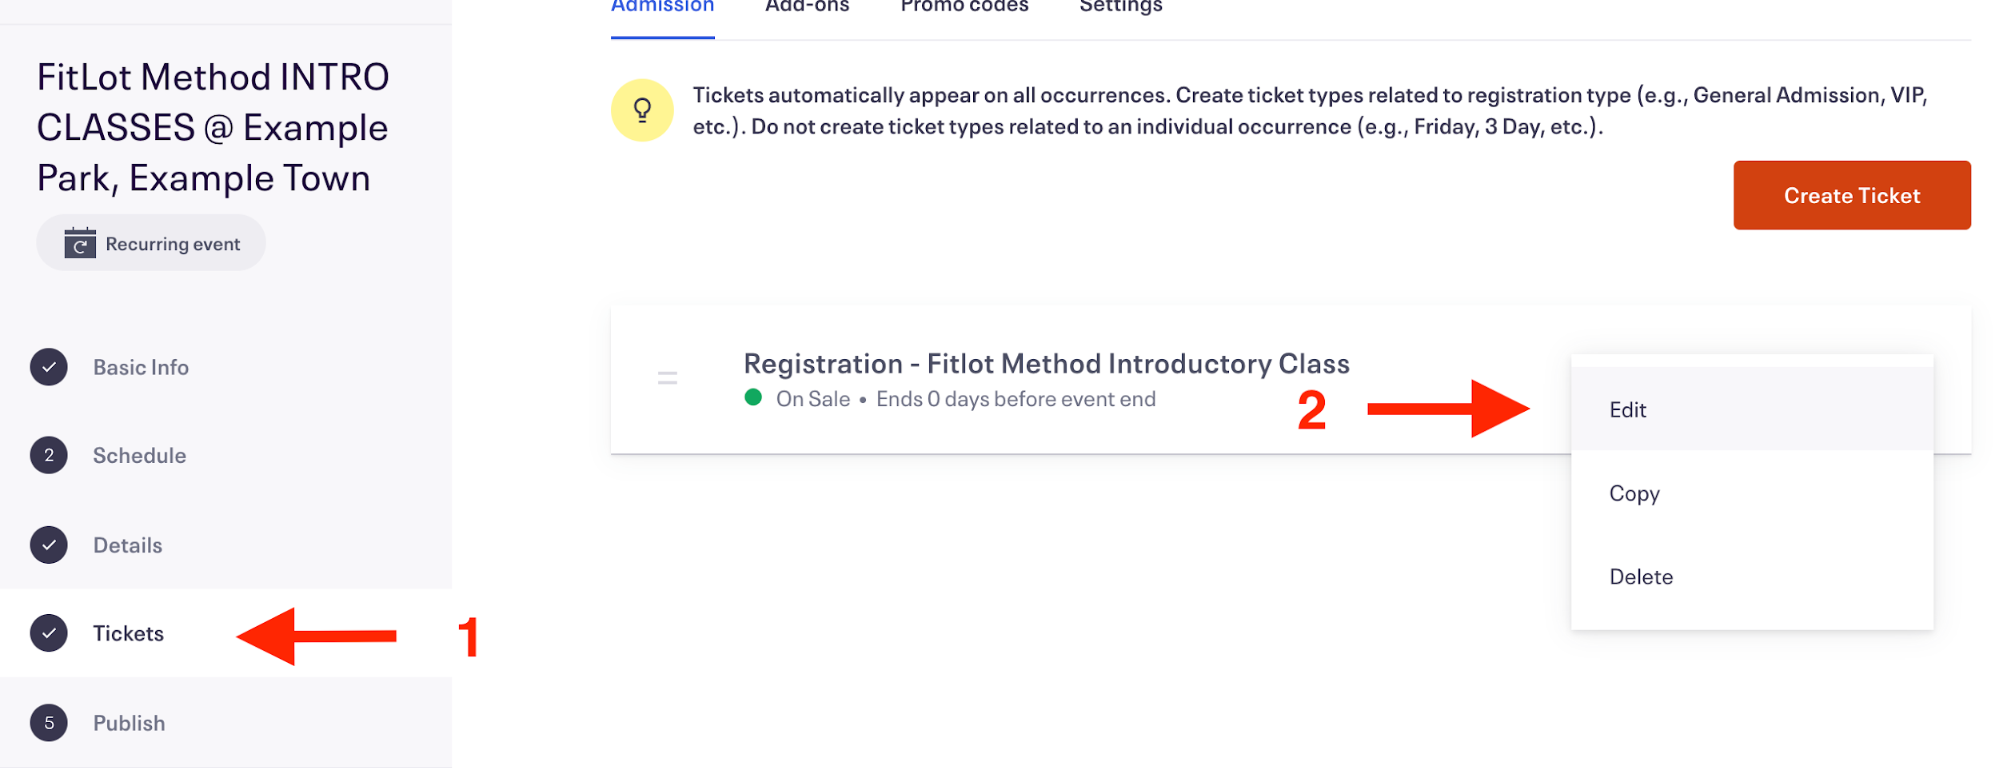
- Select “Tickets” from the menu on the left.
- The edit ticket menu will appear on the right hand side of the screen.
- – Make sure that “Free” is selected at the top of the menu
- – Update the Quantity to the maximum number of tickets available. Remember that to qualify for full funding each class must have at least 8 registants and at least 8 attendees.
- – Select save.
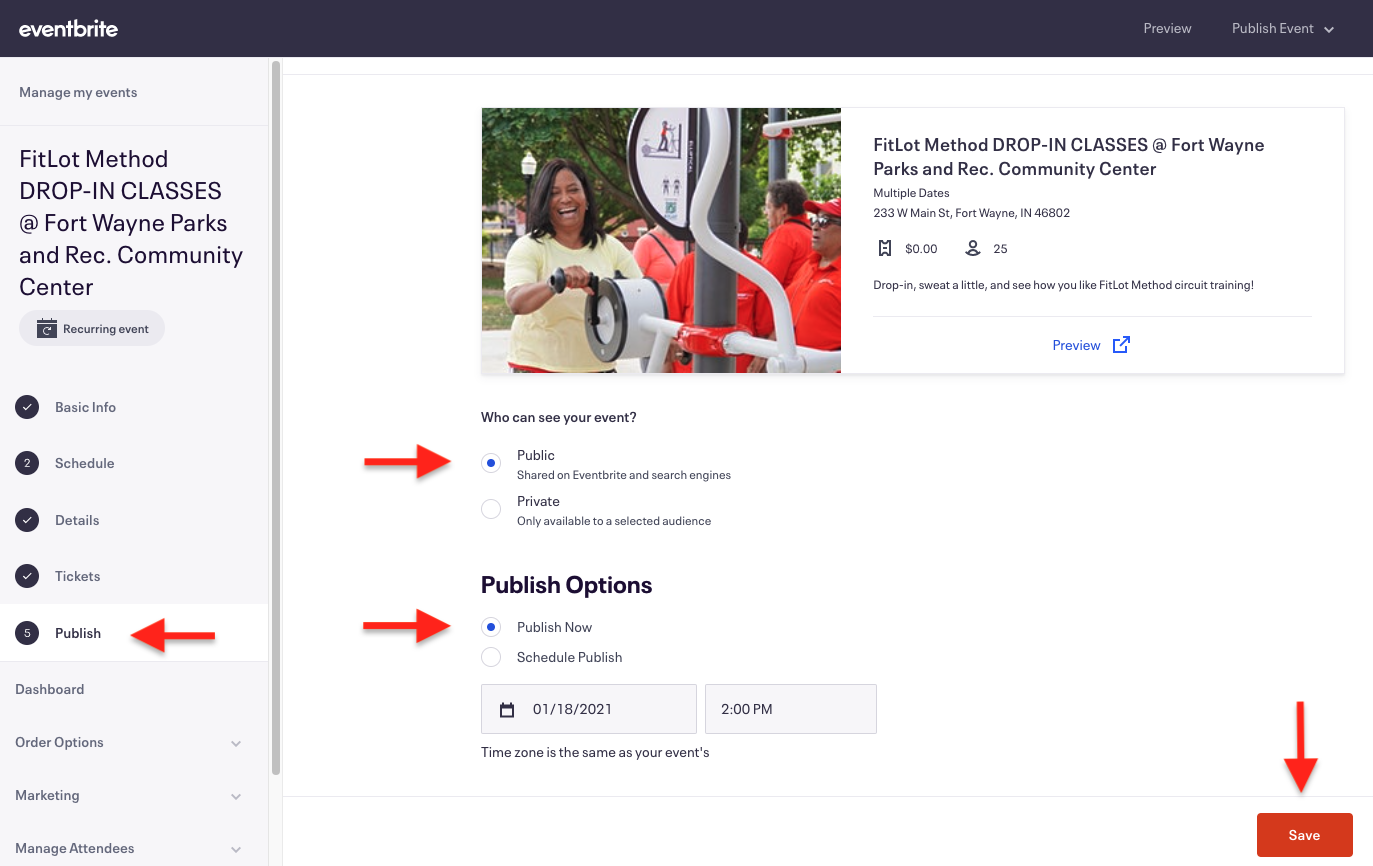
- Select “Publish” from the menu on the left.
- – Who can see your event? Select Public
- – Publish Options: Select Publish Now
- – Click Save
- – Drop-In classes are now published and participants may sign-up.


👉Save your changes regularly while editing your pages! Eventbrite DOES NOT Auto-Save your work !👈